 There is an old adage that states the only thing certain in life is death and taxes. Well, we can think of one more certainty: every homeowner will need to recaulk in their home at some point. The fact is caulk doesn’t last forever. It can chip, crack, peel away, and get dirty and even possibly moldy. And ignoring it not only won’t fix the caulk, but it can create other issues. In areas where water is present, broken or missing caulk can allow water to get between your shower/tub and wall or countertop and damage walls and/or cause mold growth. Repairing damaged caulk is extremely important, and the good news is this is a simple repair that anyone can do on their own.
Inspecting caulking should be on your routine maintenance checklist so you can catch problems early and prevent the bigger problems from happening. Check your caulking at least once a month, and when you notice cracks, chips, or missing pieces, recaulk right away. Here is a simple guide to recaulking in your home.
Remove Old Caulk First
If you are repairing a small crack or chip, you may be able to get away with just adding fresh caulk to the existing caulk line. But if you want to get the best overall result (read: a nice, smooth finish) and ensure the new caulk sticks to the surface, it’s best to remove the old caulk before applying any new caulk to your surface. If there is a large amount of caulk to remove, you may want to start by scraping as much of the caulk off the surface as possible with a utility knife or other similar tool. Once you’ve removed most of the caulk (or if there isn’t much there to begin with), apply a caulk remover (available at home improvement stores). Follow the instructions on the caulk remover carefully, including how long to let it sit on the surface, then use a razor scraper to remove any remaining caulk.
Clean the Area
Once the old caulk has been removed, clean the area where you will be applying fresh caulk. Soap and water works fine for this – you just need a clean surface on which to work. If there was mold in the caulking when you removed it or you notice mold in the gap between the wall and your tub/shower/countertop, treat the area with a mold-killing product first. Be sure to thoroughly rinse any soap or product from the area, then allow it to dry fully before applying caulk.
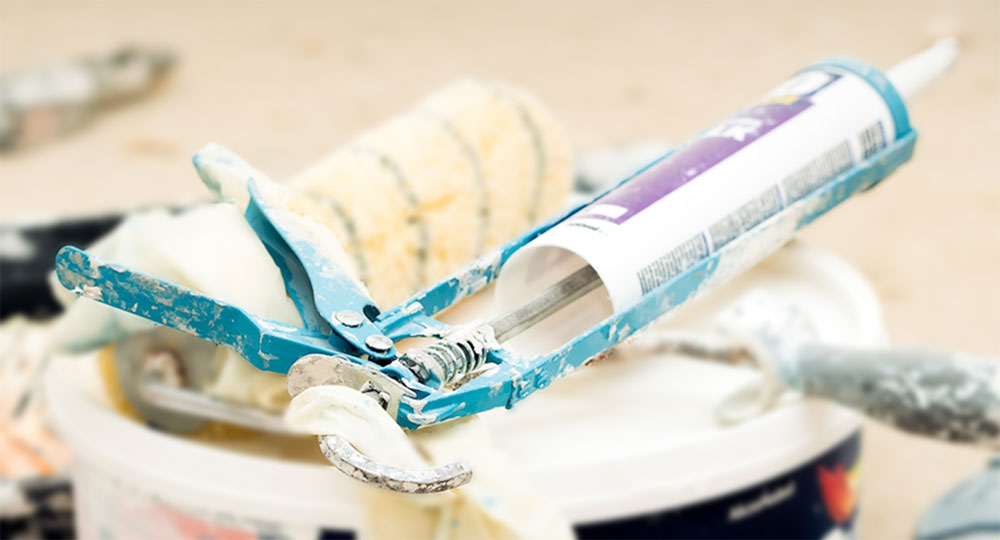
Apply New Caulk
Apply a bead of caulk along the edge of the tub/shower/countertop and wall, then smooth it over with your finger to get a nice, clean edge.
A few tips from pros on applying caulk:
- If you are unsure about your caulking skills, practice on a piece of plywood before starting on your tub/shower/countertop.
- Make sure when you cut the nozzle on your caulk, it is big enough to accommodate the widest gap so it can fill in one line but not much larger than that gap to avoid excess caulk being applied.
- Cut your caulk nozzle at an angle. FamilyHandyman.com’s experts “prefer cutting the caulk tube nozzle at a blunt 20-degree angle, instead of 45 degrees. And they hold the gun at a 90-degree angle to the gap while pushing a small bead ahead of the tip.”
- Only apply enough caulk to fill the gap.
- Be sure to apply pressure as you are moving the caulk gun.
- If you have a long line to apply, try to apply in one run to avoid globs. If you have to stop midway through, do not start at the point you stopped. Go to the other end and move back towards the already caulked area and meet in the middle.
- If you are using an already opened tube of caulk and/or caulk gets stuck in the nozzle, insert a screw and twist it to break up and remove any stuck caulk.
- Wet your finger before smoothing the caulk and start out the outer corner with your finger.
- Concerned about getting a straight line? Apply painter’s tape above and below the gap, then caulk between that. Any excess caulk will go on the tape, which you will peel up later, giving you a clean, straight line. Important: Be sure to remove tape while the caulk is still wet.
- Another option for straighter lines is caulk strips found at your local home improvement store.
- Be sure to use the right type of caulk. For areas where water is present – around sinks, tubs, etc. – silicone caulk is recommended. Latex and latex acrylic caulk is best for areas that require painting.
- Clear, white, or other neutral colors that are found at home improvement stores will work for most jobs. However, if you really need colored caulk for your job, try flooring and tile stores.
Looking for your dream home? Liberty Homes has been building new homes in Utah for more than 25 years. We take pride in our trade, crafting each home as if it were our own. Our quality, affordable homes are energy smart and thoughtfully personalized for your active Utah lifestyle. We currently have a limited number of single-family homes available in Bluffdale and West Valley and townhomes available in Salt Lake City. Contact us today to get started building your new home.

Want home decorating and maintenance tips, craft ideas, recipes, and more delivered right to your inbox?
Sign up for our monthly newsletter:


